Installation: Bitbucket
In order to use ContinuousPipe with a Bitbucket repository, you need to configure two interaction points:
Creating a Connected Account in ContinuousPipe
The first interaction is connecting your Bitbucket account to ContinuousPipe. This is needed when creating a flow so that ContinuousPipe can list repositories to select.
Setting up a connected account is demonstrated in the Quick Start guide to creating a flow.
Installing the ContinuousPipe Integration in Bitbucket
Warning
The integration needs to be installed on the Bitbucket account hosting the repository. If you don’t control the account hosting the repository, you will need the account owner to perform this step for you.
The second interaction is installing the ContinuousPipe integration in Bitbucket. This is needed in order to let ContinuousPipe know about any repository changes that have been made and to add comments on pull requests.
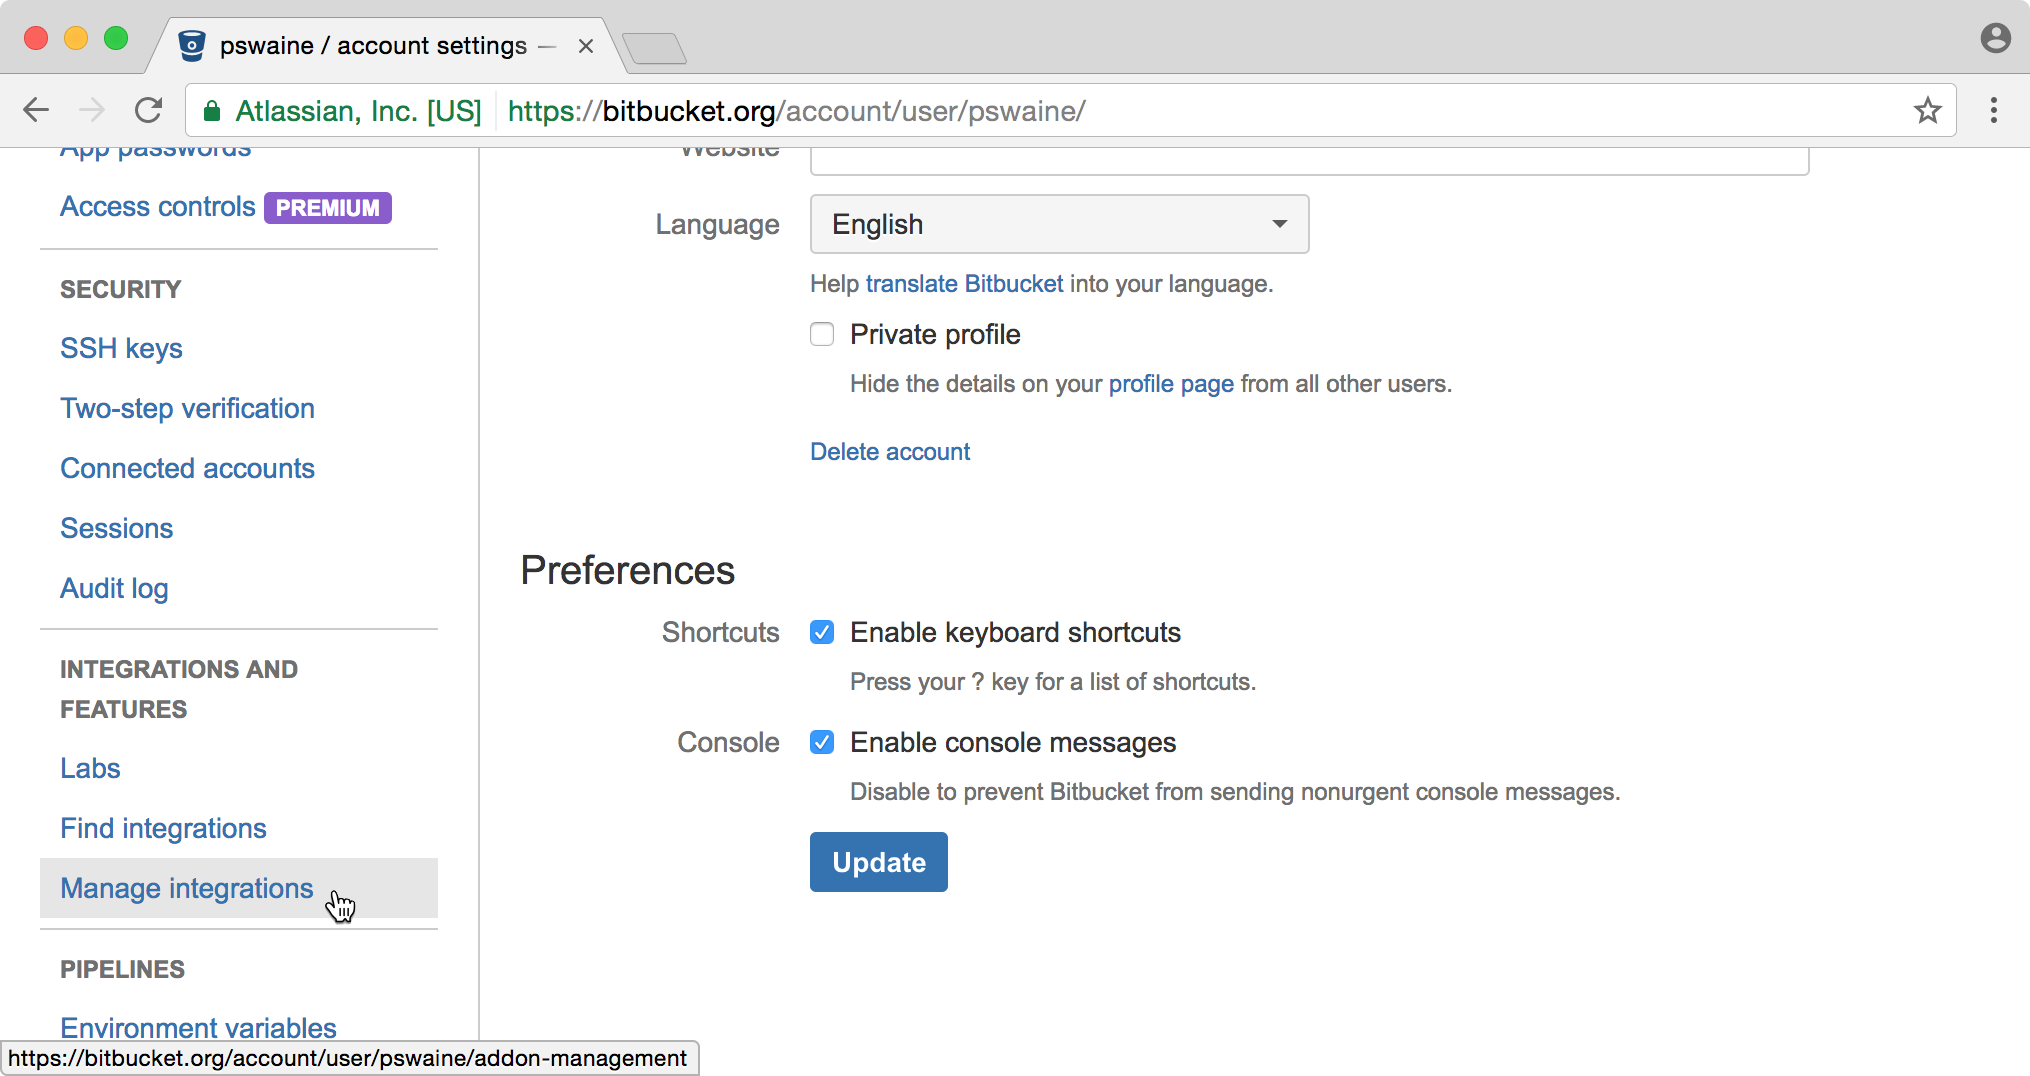
Go to the Bitbucket account settings page, and in the left menu click on “Manage integrations”.
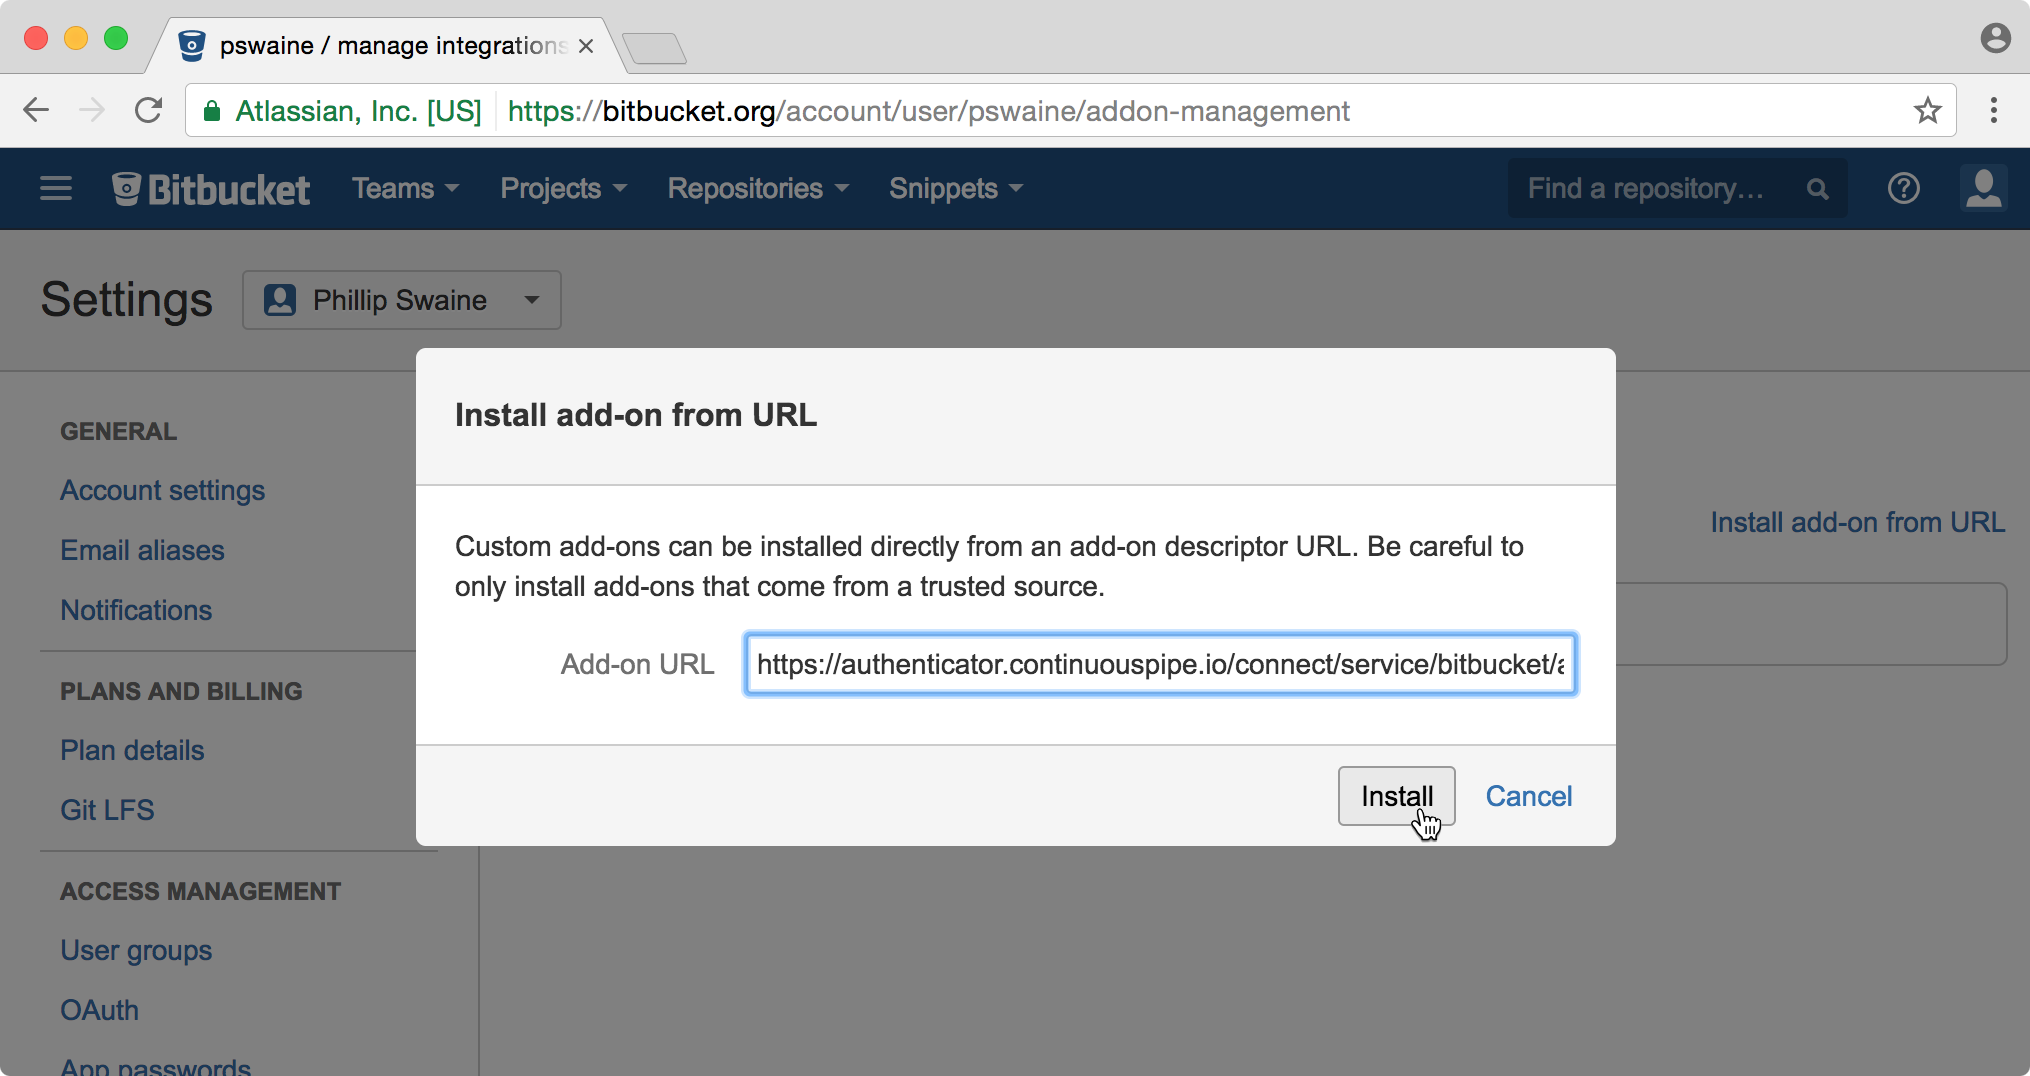
You can now click on “Install add-on from URL” and enter https://your-api.example.com/connect/service/bitbucket/addon/ as show in this example:
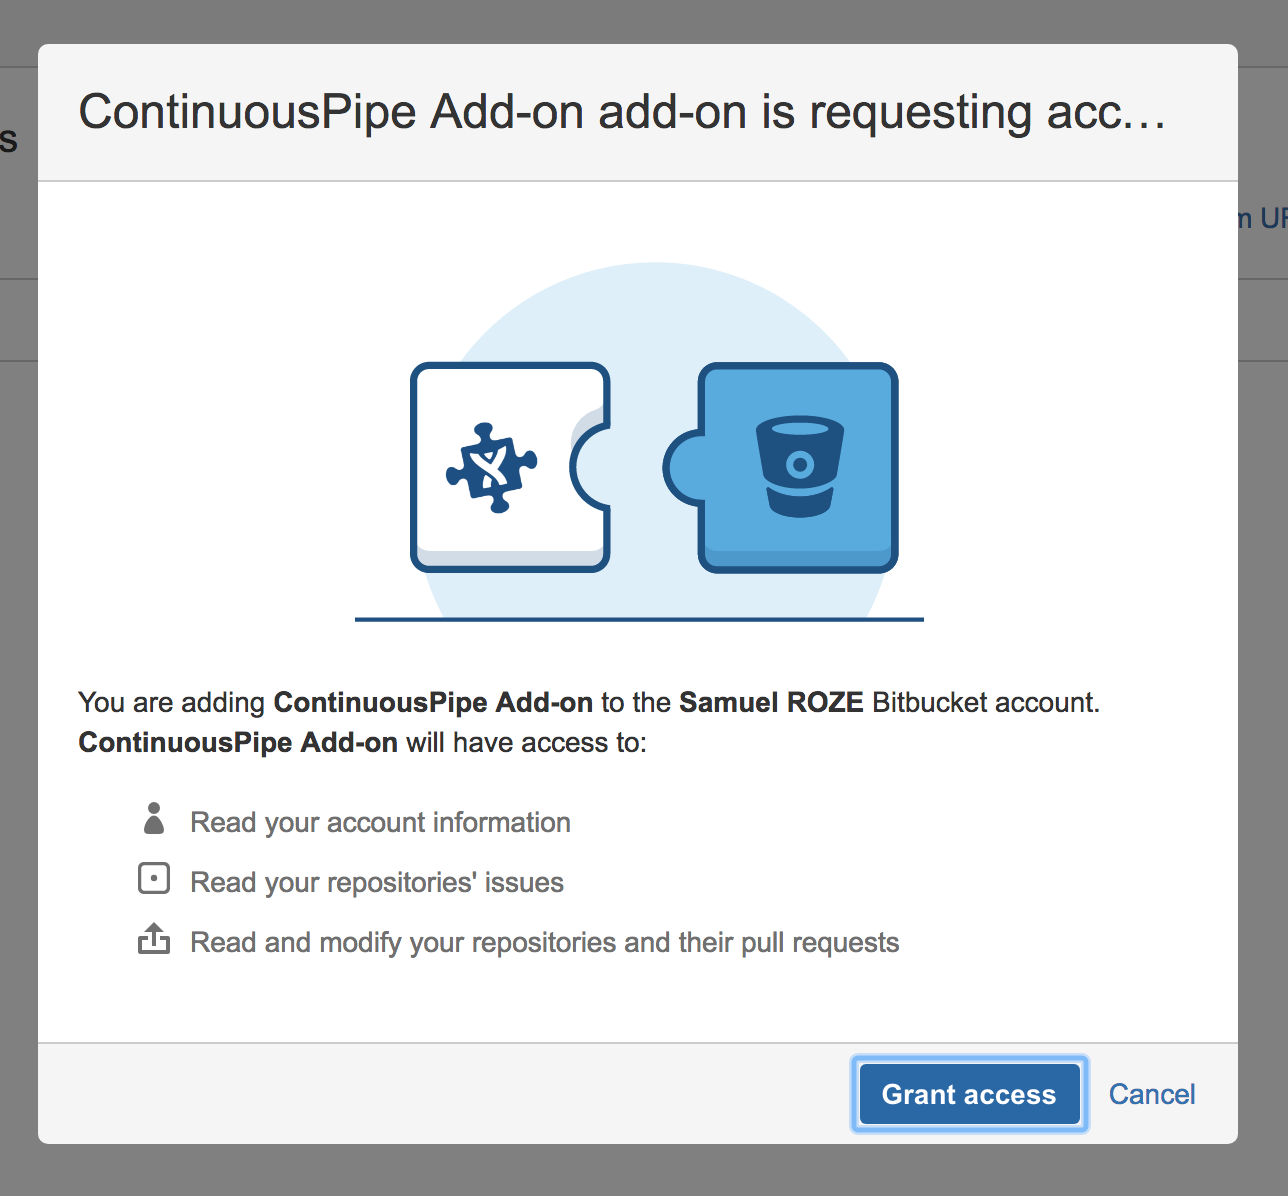
The last step is to grant ContinuousPipe access to the code repository by clicking the “Grant access” button in the following screen.
You are now all set and the Bitbucket integration is configured for the code repository.